This page discusses how to program in ASP.NET Core by using MVC (Model-View-Controller) framework and C# according to following sources: The construction outline is given as follows:
- Set up Visual Studio: Download and install Visual Studio (or Community), then open it.
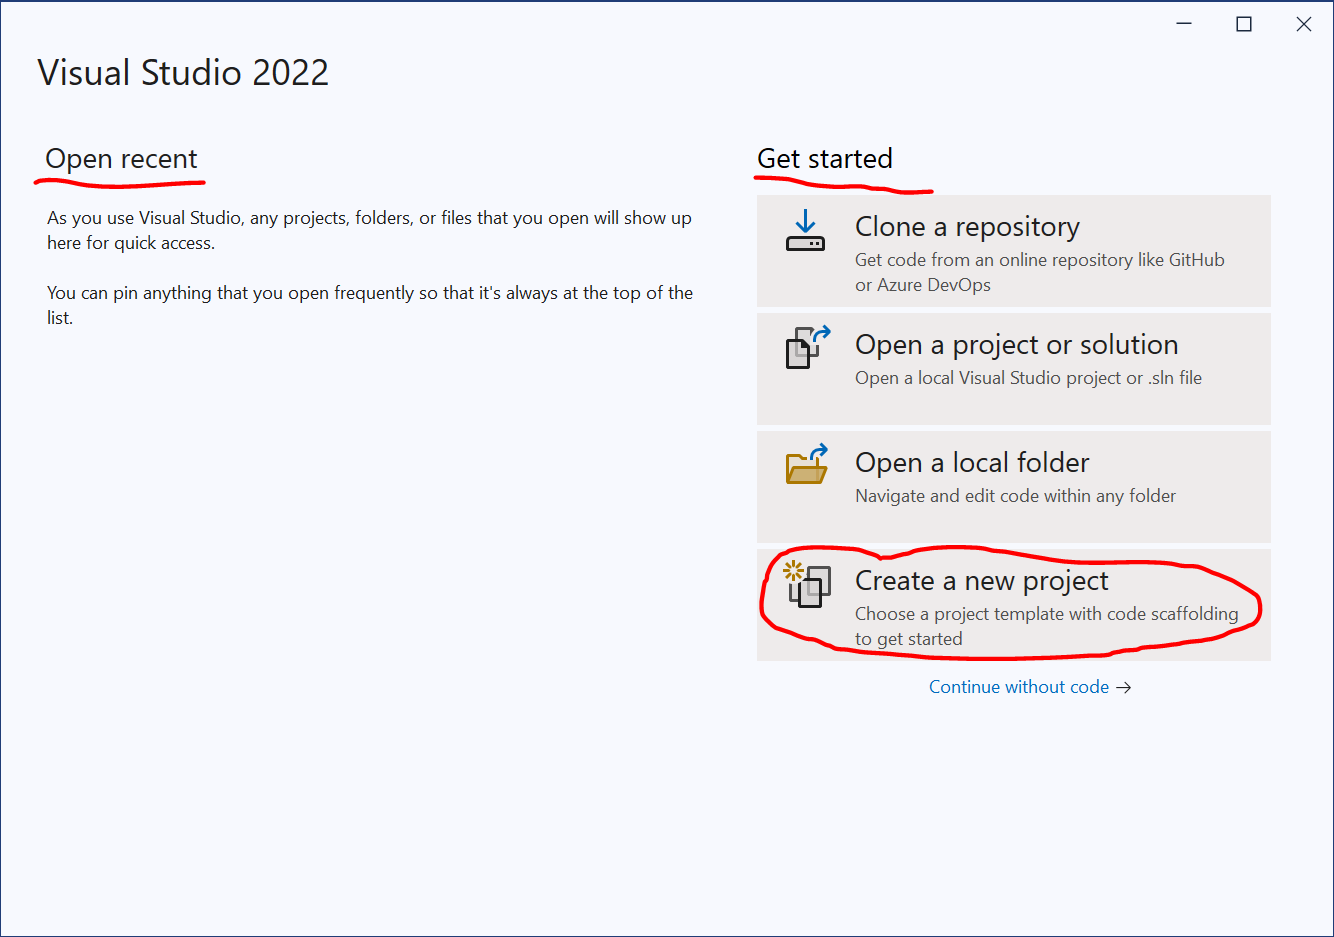
- Create a new project: In Visual Studio, select .
- Choose a template: Select a template for your project, such as .
- Add models, views, and controllers: Create controllers to handle requests and views to display content.
- Run your application: Use the built-in server to run your application and view it in a web browser.
- Check the Microsoft ASP.NET Help Pages.
- Download and Install Visual Studio Community. Visual Studio is a full-featured integrated development environment (IDE) for Android, iOS, Windows, web, and cloud.
- Community: Powerful IDE, free for students, open-source contributors, and individuals,
- Professional: Professional IDE best suited to small teams, and
- Enterprise: Scalable, end-to-end solution for teams of any size.
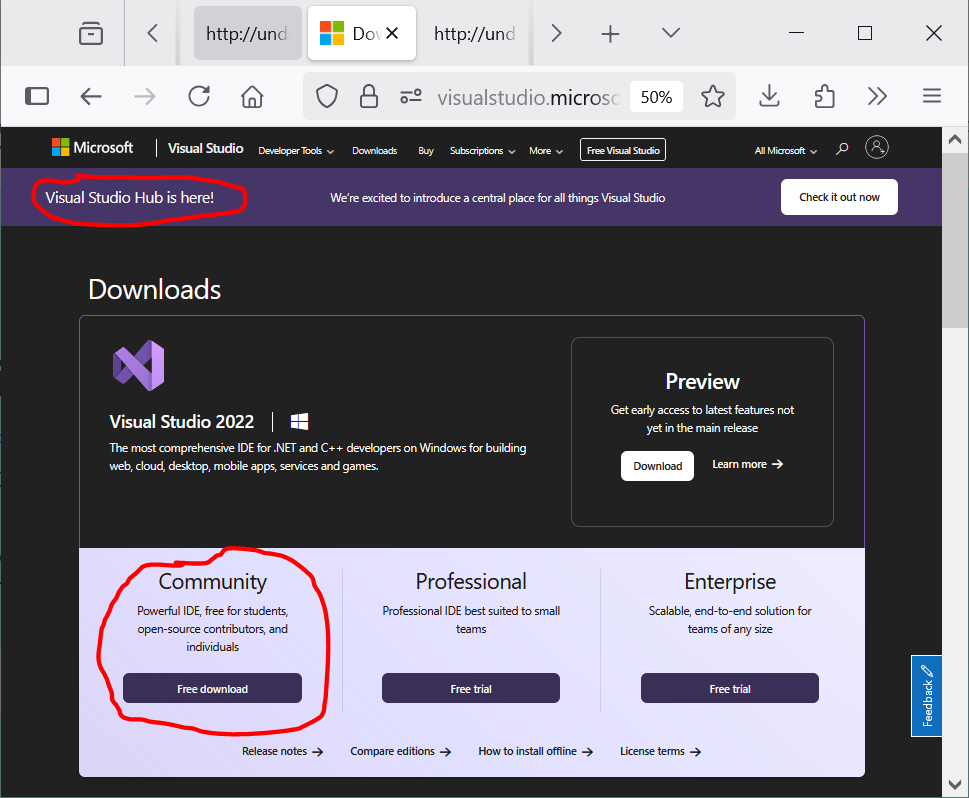
It has three editions:
Visual Studio Community, a revamped edition of Visual Studio Professional, is free for individual. VS Community is not a trial version, nor an Express-style narrowly limited product. It is the same as Visual Studio Professional, except that it does not include the CodeLens feature, and it is activated through a Microsoft account instead of a product key.
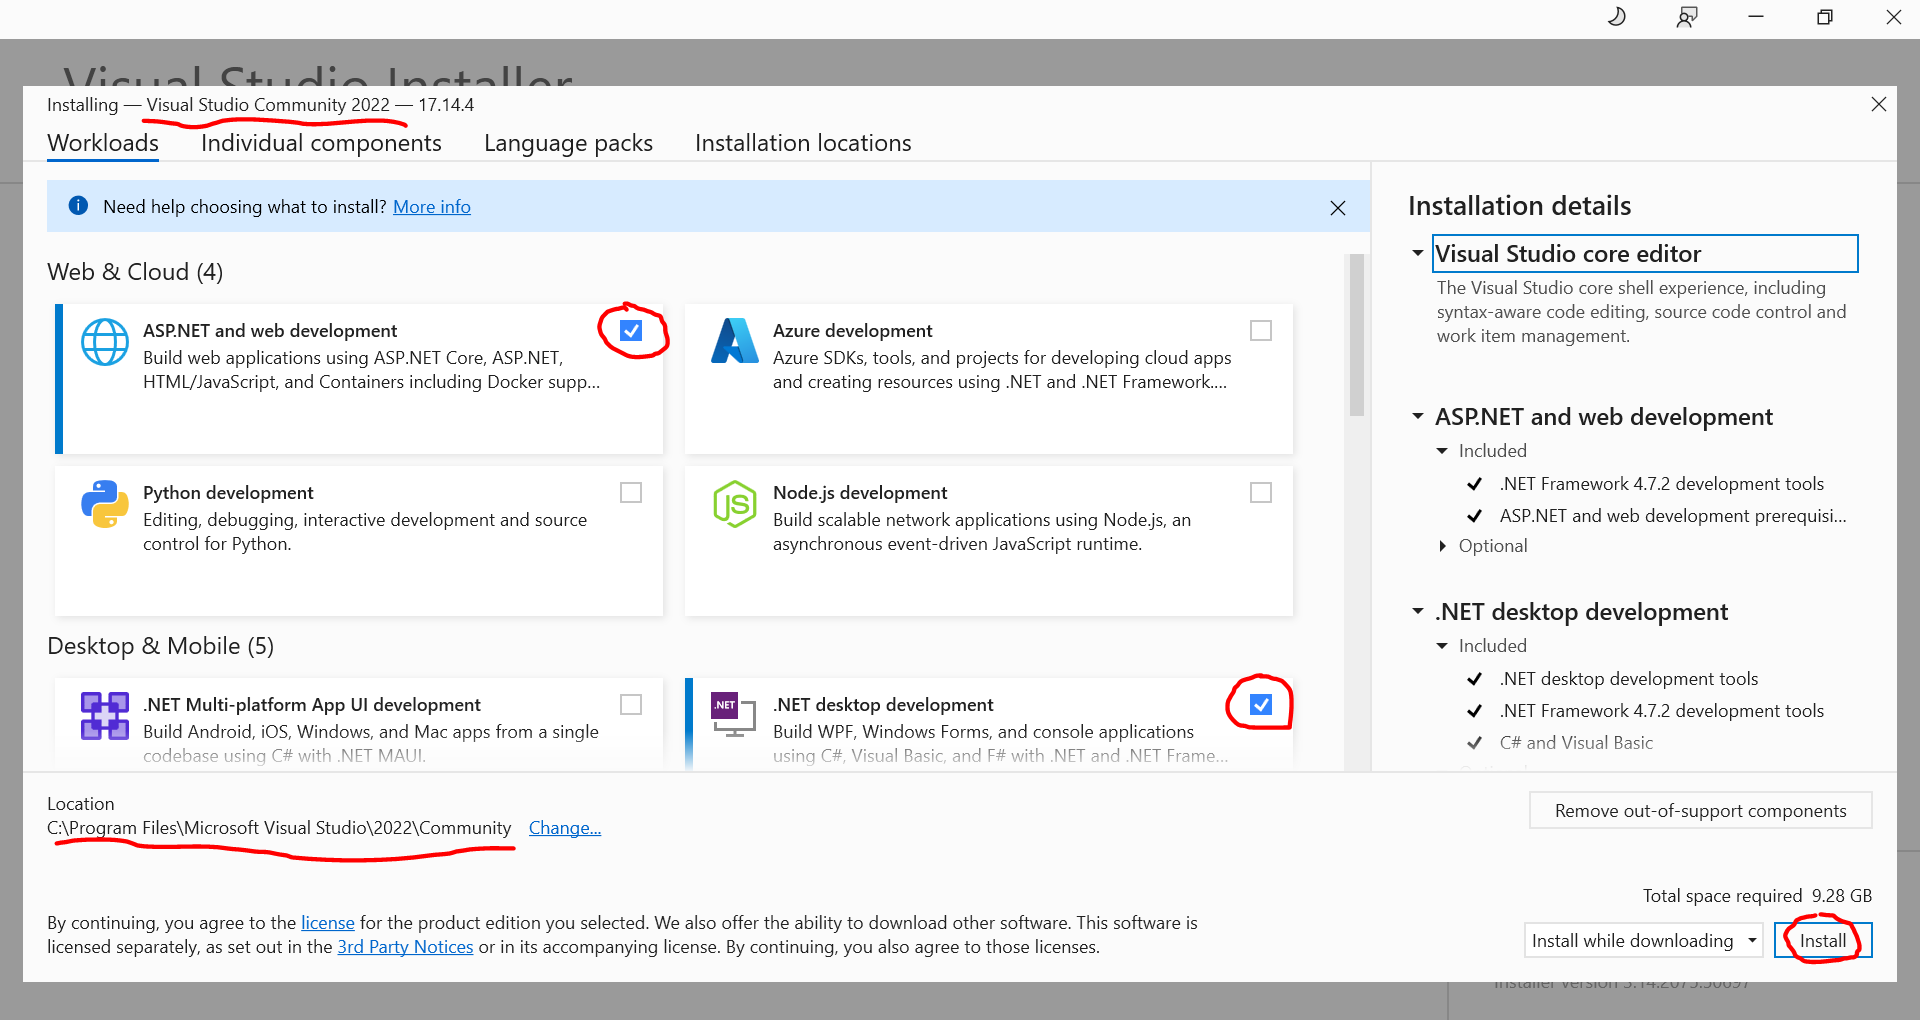
- Start the Visual Studio Community 2026. Select the following Windows options:
- Solution ( or ): The top-level container or “binder” that groups together multiple distinct programming tasks, libraries, or applications that belong to the same overarching work or product.
- Project (, , etc.): A sub-container inside a solution that holds specific code files, references, and compilation instructions needed to build a single discrete item like an executable app () or a library ().
- Code Files (, , ): The raw text files containing your actual programming logic.
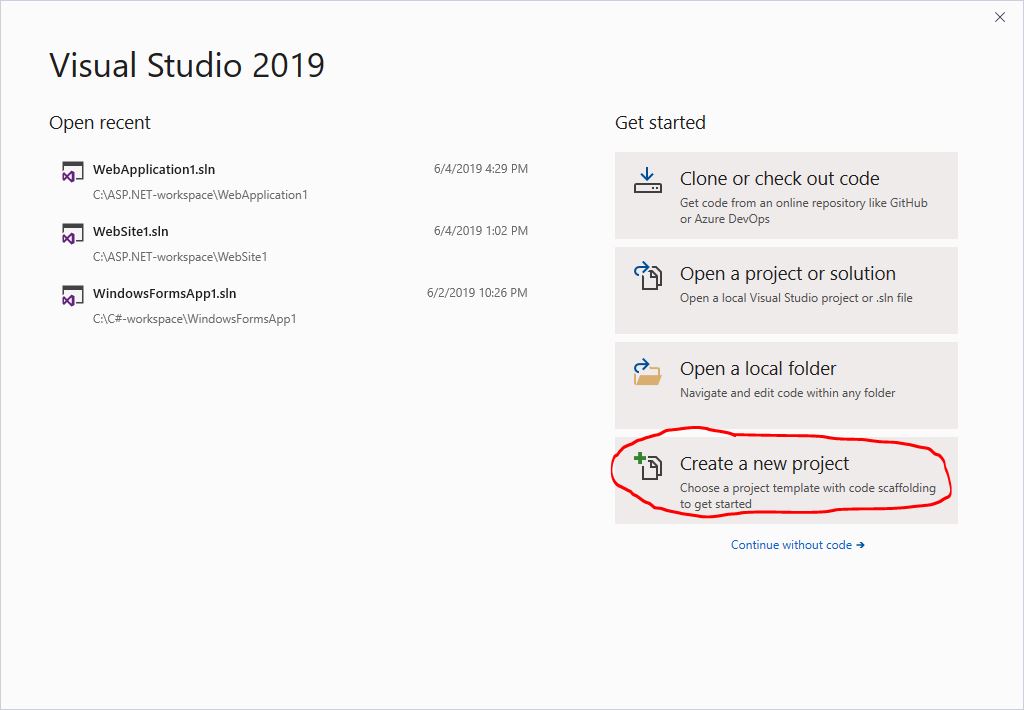
- Create a New Web Application. Follow the next steps:
- Pick the option :
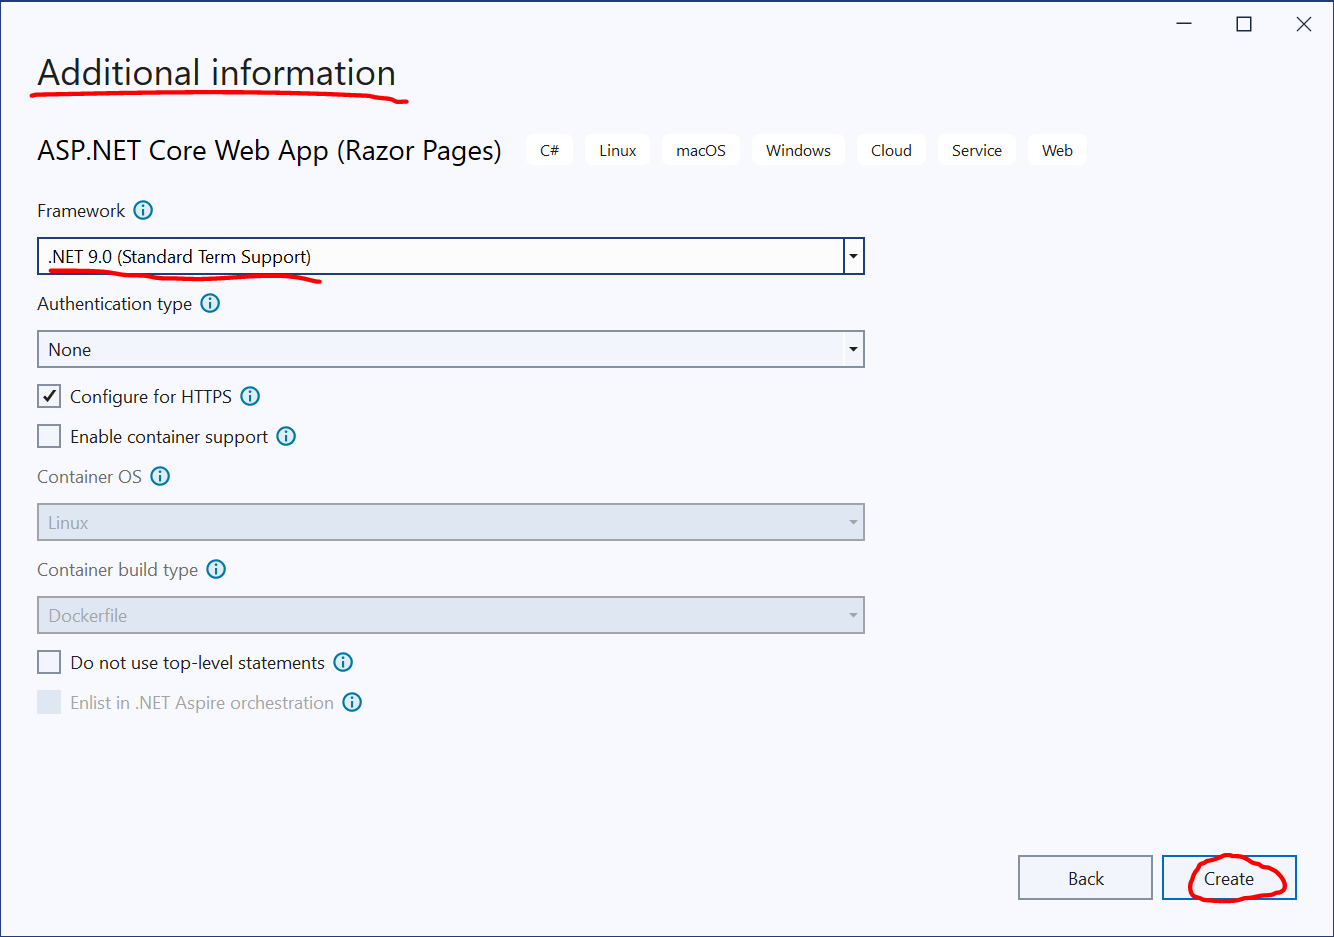
- Select the template :

- Configure the application by entering the following information:
- Project name such as ,
- Location such as , and
- Checking .

- Visual Studio IDE (integrated development environment) will be displayed as follows:

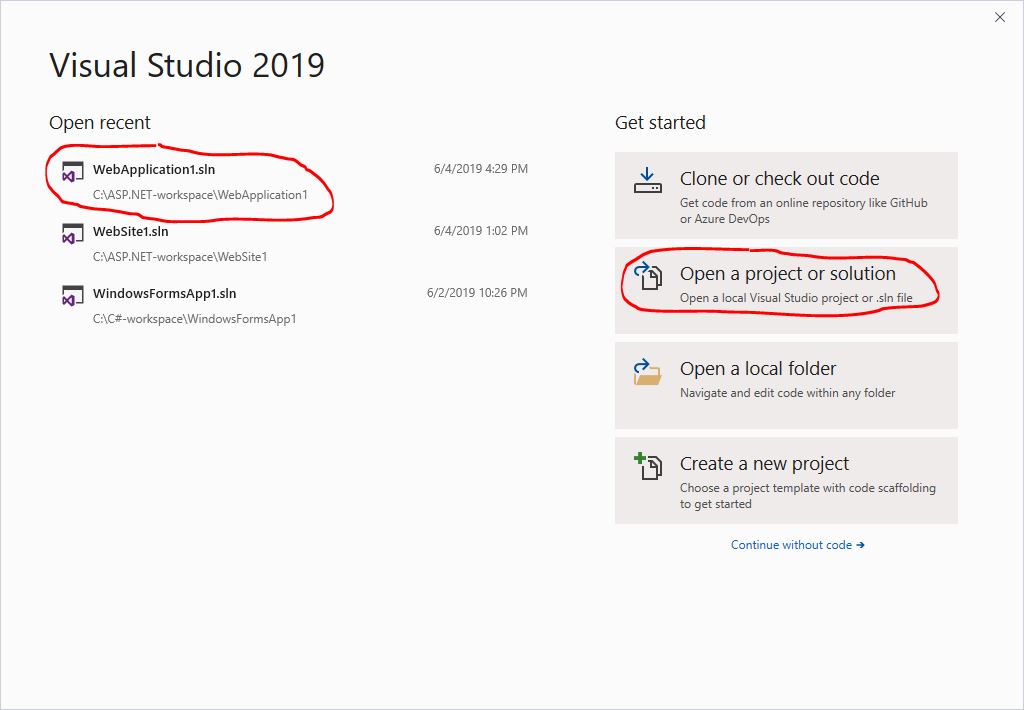
Start 🡆 All Programs 🡆 Visual Studio 2026If you want to open an existing project, pick the project with the (solution) file extension where
Otherwise, go to the next step.
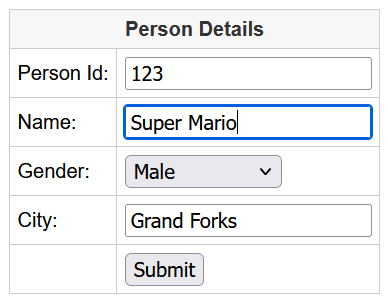
View handles the user interface. It displays data from the model and sends user input back to the controller. |
|

|
 @model WebSite1.Models.PersonModel
 @{ Layout = null; }

 <!DOCTYPE html>
 <html>
  <head><title>Index</title></head>
  <body>
   @using ( Html.BeginForm( "Index", "Home", FormMethod.Post ) ) {
    <table cellpadding="0" cellspacing="0">
     <tr>
      <th colspan="2" align="center">Person Details</th>
     </tr>
     <tr>
      <td>Person Id:</td>
      <td>@Html.TextBoxFor(m => m.PersonId)</td>
     </tr>
     <tr>
      <td>Name:</td>
      <td>@Html.TextBoxFor(m => m.Name)</td>
     </tr>
     <tr>
      <td>Gender:</td>
      <td>
       @Html.DropDownListFor( m => m.Gender,
        new List<SelectListItem> {
         new SelectListItem { Text="Male", Value="M" },
         new SelectListItem { Text="Female", Value="F" } },
	 "Please select" )
      </td>
     </tr>
     <tr>
      <td>City:</td>
      <td>@Html.TextBoxFor( m => m.City )</td>
     </tr>
     <tr>
      <td></td>
      <td><input type="submit" value="Submit" /></td>
     </tr>
    </table>
   }
  </body>
 </html>
|
Model represents the data and business logic. It interacts with the database and processes information.

Take the following steps to revise the model:
- Right click the in the pane of the :
Models 🡆 Add 🡆 New Item...
- Pick the template: .
- Give a file name like .

|
 namespace WebSite1.Models {
  public class PersonModel {
   /// <summary>
   /// Gets or sets PersonId.
   /// </summary>
   public int PersonId { get; set; }

   /// <summary>
   /// Gets or sets Name.
   /// </summary>
   public string Name { get; set; }

   /// <summary>
   /// Gets or sets Gender.
   /// </summary>
   public string Gender { get; set; }

   /// <summary>
   /// Gets or sets City.
   /// </summary>
   public string City { get; set; }
  }
 }
|
Controller acts as the intermediary between the model and the view. It processes user input, updates the model, and determines which view to display.

|
 using WebSite1.Models;
 using Microsoft.AspNetCore.Mvc;
 // using System.Web.Mvc;

 namespace WebSite1.Controllers {
  public class HomeController : Controller {
   // GET: Home
   public ActionResult Index( ) {
    return View( );
   }

   [HttpPost]
   public ActionResult Index( PersonModel person ) {
    int personId  = person.PersonId;
    string name   = person.Name;
    string gender = person.Gender;
    string city   = person.City;
    return View( );
   }
  }
 }
|
- Build and Debug the Web Application. Build the website by selecting the following options:
Build 🡆 Build SolutionUnless there are a web server and an IP address on your machine, the web pages can only be accessed by a browser on the local machine. You can see this by noticing the URL is, for example,
https://localhost:7243If the build is successful, debug the website by right clicking the end of each of the 5 commands:
Breakpoint 🡆 Insert Breakpoint

Debug 🡆 Start DebuggingOne example of execution results is shown as follows:

🡇

Since no database is used, the submitted data is not be saved. Instead, we use debugger’s breakpoints to check the submitted values. The is shown by picking the following options:
Debug 🡆 Windows 🡆 Watch 🡆 Watch 1refers to the first of four independent Watch windows used during a live debugging session to monitor specific variables, objects, and custom code expressions. When you run your ASP.NET application in debug mode and hit a breakpoint, you can use to keep a continuous eye on data as you step through your code line by line.
|
“I asked my brother-in-law, the father of four boys, ‘If you had it to do all over again, would you still have kids?’ ‘Yes,’ he said. ‘Just not these four.’” — Sheila Lee |